I know.
It's been a year. A really hard, hard year. I'll be spending the first half of 2015 explaining and showing all about 2014. Sorry. That's all I can say about that. If you follow me on FB you understand.
If not, you will understand in about March.
OK, so here we go: This tutorial is for a slip cover for CTMHs newest Score Board. It's sleek and very sturdy, however I travel with mine, so I wanted something to give it a bit of protection.
You can see and order it from my website. Click
here
I've found my love for "craft" sewing again! Sew glad! Notice how I said "craft" sewing. I am by no means a pro. I can fudge with the best. I don't worry about the grain, or in most cases pre-washing. Don't hate or sue me.
Here's where I scour the internet (or Pinterest) for the basics, then have to fudge for what I wanted.
Basic idea. Click
here. Lots of differences, we don't need a slip pocket nor a piece of elastic.
All seams are "about" 1/2"
Supplies:
2 fabric pieces cut 10 3/4" by 15 1/2"
2 flannel pieces cut 10 3/4" x 15 1/2"
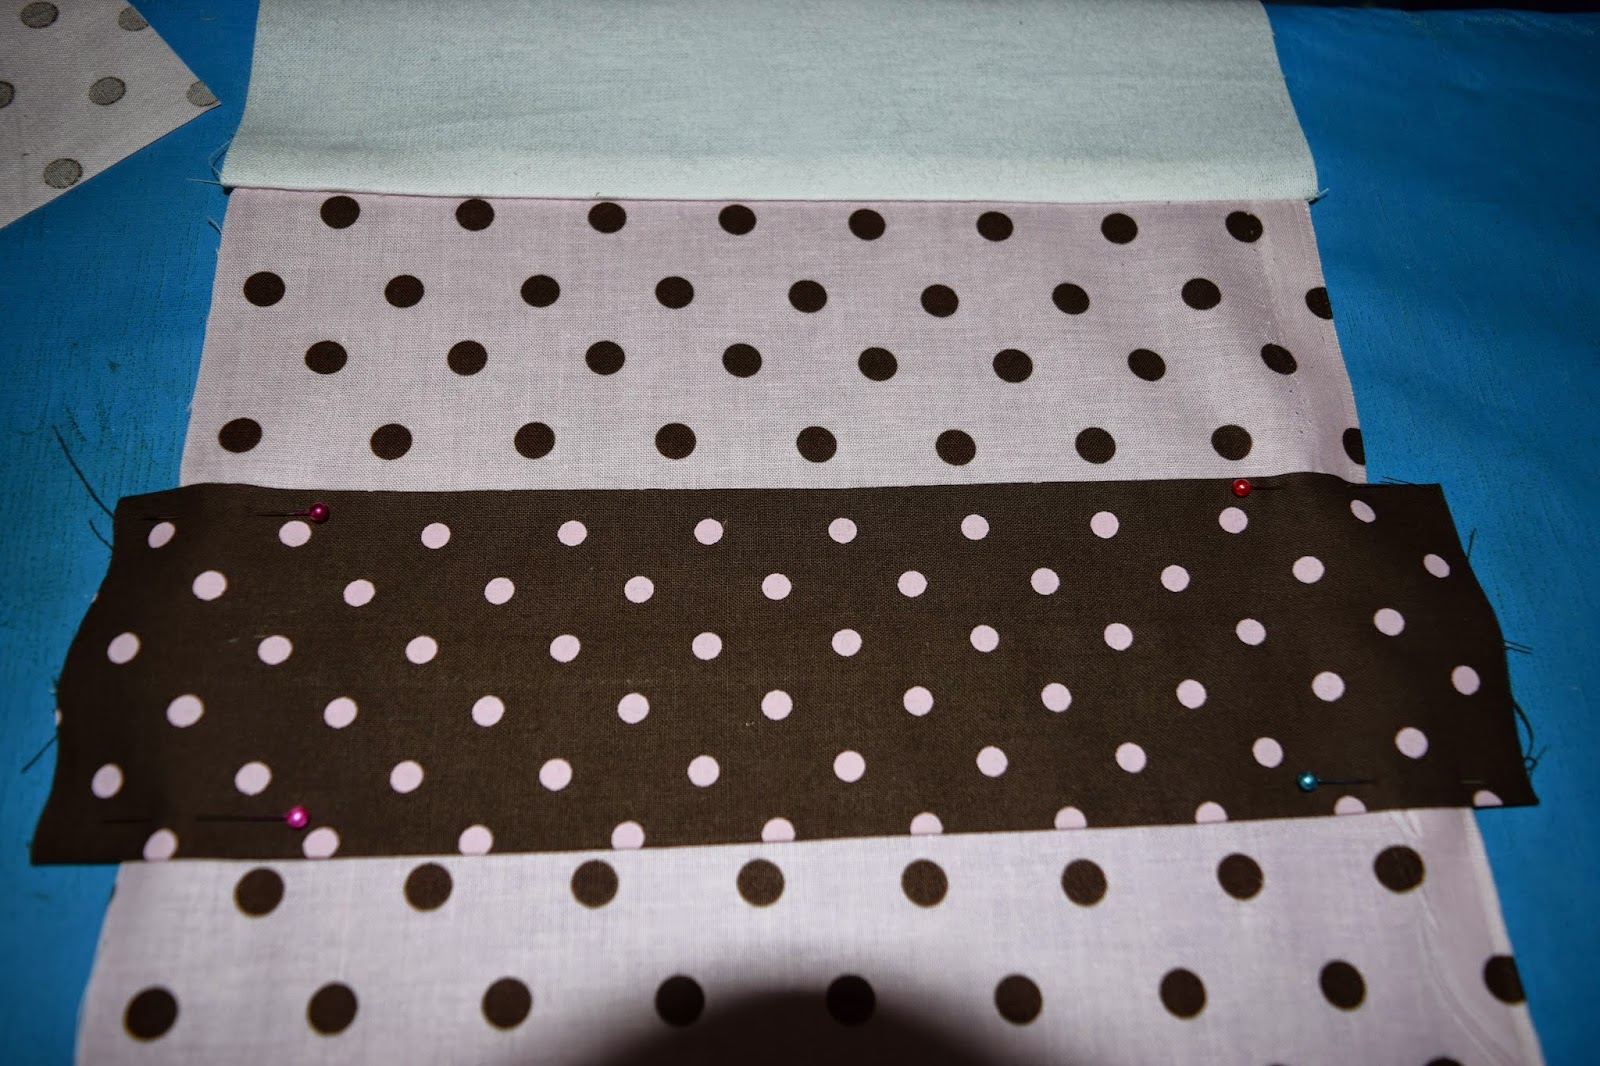
Contrasting fabric 1 piece cut 7" x 12" (shown first) sew on long end. Turn and press. Set aside.
On the short sides, sew each fabric piece to it's flannel piece, press seam allowance towards flannel.
there's this strange dark spot on my pictures…hmmm hello? new cameras shouldn't do that.
On the front on one fabric piece center the sash to overlap evenly. Baste. (you could skip the basting if you are a better sewer than me with multiple pin layers). Do not trim yet.
grrr..there's that dark spot again! what the heck?
Lay the two pieces right sides together.
Here's one important step. Match those top seams. (never mind the bandaid, I have accidents often)
oh good it's gone!
Leave about a 2" opening to turn inside out. I do this on the flannel piece.
seriously, there it is again!
Opening
Turn inside out. I usually stick my fingers in the opening and aim for the farthest fabric corners first.
omg! what IS THAT dark spot?!
Then push the fleece back into the main fabric.
Now before you press and close up your opening, I slide the tool in just to make sure. Not sure why! I've made 22 now and they all turn out fine. But go ahead and humor me. Plus it's good practice.
Ok NOW, turn back so the inside is on the outside and clip your corners, and trim the sash ends.
Now, stick your fingers back in the corners, pull right sides out again.
Work the fleece into the corners at the bottom. Press. Sew your opening.
Now get your button maker out and use a piece of the main fabric and make a 2" button.
What? You don't own a button maker? Quick! Hop on over to
I Like Big Buttons to get yours!
I add a bit of our Liquid Glass around the inside edge and center just for kicks.
ok, this dark spot makes me think I need my eye exam a bit early this year...
I don't worry about stitching the actual sash to the main cover, just secure your button well in the center.
Viola!
Here's some others I've made for some very special Scrapbook Diva friends!
Whew! This Blog post felt good.
and that stupid dark spot is gone…
It's good to be back.